1. TTYD 설치
ttyd 는 웹 기반 터미널 애뮬레이터라고 한다.
WebSocket 프로토콜을 사용해서 브라우저와 Linux 터미널 간의 실시간 연결을 제공한다고 한다.
사용하는 이유는 docker 로 container 를 만들어서 사용할 경우에 직접 컨테이너 안을 들어가기가 어렵다.
(openshift 나 기타 툴을 사용하면 모를까..)
그래서 컨테이너 안에서 잘 작동하고 있는지 터미널을 붙혀보기위해 오늘은 ttyd 를 사용하는 방법을 알아보려한다.
나는 Rocky Linux 9.x 에서 작업한다.
설치하는 방법은 아래 페이지에서 가져왔다. (CentOS)
https://snapcraft.io/install/ttyd/centos
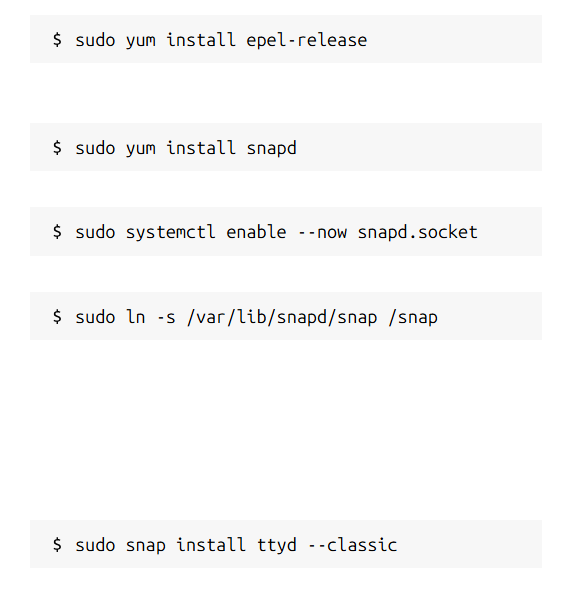
나의 경우 Rocky Linux 9.x 이기 때문에 yum 명령어 대신 dnf 명령어로 수행한다.
sudo dnf install epel-release

sudo dnf install snapd

systemctl enable --now snapd.socket

sudo ln -s /var/lib/snapd/snap /snap

sudo snap install ttyd --classic
마지막 명령어에서 에러가 났다.
[root@hostname ~]$ sudo snap install ttyd --classic
error: too early for operation, device not yet seeded or device model not acknowledged
snap 명령어가 승인되지 않았다라고 나온다.
systemctl enable 명령부분에서 start 는 안되는 것 같다. (그냥 서버 재기동 시에 시작되게만 되는 듯)
상태를 확인해보았다.
[root@hostname ~]$ systemctl status snapd
○ snapd.service - Snap Daemon
     Loaded: loaded (/usr/lib/systemd/system/snapd.service; disabled; preset: disabled)
     Active: inactive (dead) since Tue 2025-04-08 17:29:38 KST; 1min 56s ago
   Duration: 8.004s
TriggeredBy: ● snapd.socket
    Process: 1121447 ExecStart=/usr/libexec/snapd/snapd (code=exited, status=42)
   Main PID: 1121447 (code=exited, status=42)
      Error: 2 (No such file or directory)
        CPU: 96ms
해결은 그냥 snap.socket 을 실행시켜주었다.
[root@hostname ~]$ systemctl start snapd
[root@hostname ~]$ systemctl status snapd
● snapd.service - Snap Daemon
     Loaded: loaded (/usr/lib/systemd/system/snapd.service; disabled; preset: disabled)
     Active: active (running) since Tue 2025-04-08 17:31:43 KST; 1s ago
TriggeredBy: ● snapd.socket
   Main PID: 1121496 (snapd)
      Tasks: 9 (limit: 48912)
     Memory: 16.9M
        CPU: 83ms
     CGroup: /system.slice/snapd.service
             └─1121496 /usr/libexec/snapd/snapd
Active 에 active 로 상태 설정을 잘 확인하길 바란다.
이후에 다시 원래 명령어를 실행했다.
sudo snap install ttyd --classic알아서 잘 다운받는 것 같다.
snap 이라는 명령어가 어떤 store 에서 다운받아 오는 것 같은데, 다음에 알아봐야겠다.
[root@hostname ~]# snap install ttyd --classic
2025-04-08T17:38:07+09:00 INFO Waiting for automatic snapd restart...
Warning: /var/lib/snapd/snap/bin was not found in your $PATH. If you've not restarted your session
         since you installed snapd, try doing that. Please see https://forum.snapcraft.io/t/9469
         for more details.

ttyd 1.7.4 from tsl0922 installed
installed 라고 해서 warning 은 무시하였다.
( 대충 해석하면 snap 이 설치는 되었는데 OS가 안내려갔다 올라와서 snap 에 대한 PATH 를 못찾았다는 내용 같다...
=> 알아서 뭐 잘 설치 했겠지 ㅎㅎ )
2. TTYD 를 이용하여 웹에서 접속해보기
우선 설치가 되었는 지 확인해보자
[root@hostname ~]$ ttyd -v
-bash: ttyd: command not found
나 같은 경우 없다고 나온다.
아마 아까 설치할 때 warning 나왔던 PATH 가 이 문제였나보다.
대충 위치를 가늠해보니 설치할 때 link 를 걸어줬던 /snap 으로 들어가 보았더니 거기 안에 설치가 되어있었다.
[root@hostname bin]$ cd /snap/bin
[root@hostname bin]$ ls -al
total 0
drwxr-xr-x. 2 root root 18  4월  8 17:39 .
drwxr-xr-x. 6 root root 70  4월  8 17:39 ..
lrwxrwxrwx. 1 root root 13  4월  8 17:39 ttyd -> /usr/bin/snap
[root@hostname bin]$ ./ttyd -v
ttyd version 1.7.4-68521f5
아무튼간 설치가 잘 되었다!!
기본적으로 ttyd 는 7681 포트로 웹서버를 시작한다고 한다.
-p 옵션으로 포트를 변경할 수 있다.
[root@hostname bin]$ ./ttyd -p 8080 bash
[2025/04/08 17:46:21:5072] N: ttyd 1.7.4-68521f5 (libwebsockets 3.2.0)
[2025/04/08 17:46:21:5072] N: tty configuration:
[2025/04/08 17:46:21:5072] N:   start command: bash
[2025/04/08 17:46:21:5072] N:   close signal: SIGHUP (1)
[2025/04/08 17:46:21:5072] N:   terminal type: xterm-256color
[2025/04/08 17:46:21:5072] N: The --writable option is not set, will start in readonly mode[2025/04/08 17:46:21:5073] N:  Using foreign event loop...
실행하면 알아서 서버가 띄워져있고 client 를 listen 하고 있다.
이제 브라우저를 열어서 접속한다.
{서버IP}:8080 으로 접속하면 된다.

이렇게 접속이 된다.
그리고 서버는 잘 연결되었다고 client 의 정보를 보여준다.
이렇게 ttyd 설치해서 사용하면 될 것 같다.
'LINUX > 리눅스 인프라 셋팅' 카테고리의 다른 글
| pod, container 에 접속하는 방법 (웹 브라우저로 접속) (0) | 2025.04.14 |
|---|